Create Working with Git remotes, forks , pull requests-2
Topics to be Covered
- Git Remotes
- Push Command
- Fetch Command
- Pull Command
- GitHub
- Forking a Repository
- Making a Pull Request (PR)
- Git Cherry-Picking
Git Remotes
Introduction to Git Remotes
A Git Remote is essentially a publicly accessible copy of a Git repository that includes the entire codebase along with its version history. This remote repository serves as a centralized location where multiple developers can collaborate on the same project, ensuring that all team members can access the latest version of the project and contribute their changes.
Push Command
Scenario: Collaborative Development
Imagine you are working on a project where several developers contribute code. For example, Developer 1 and Developer 2 are both working on different features of the same project. Developer 2 has completed their feature and needs to share their code with Developer 1 and the rest of the team.
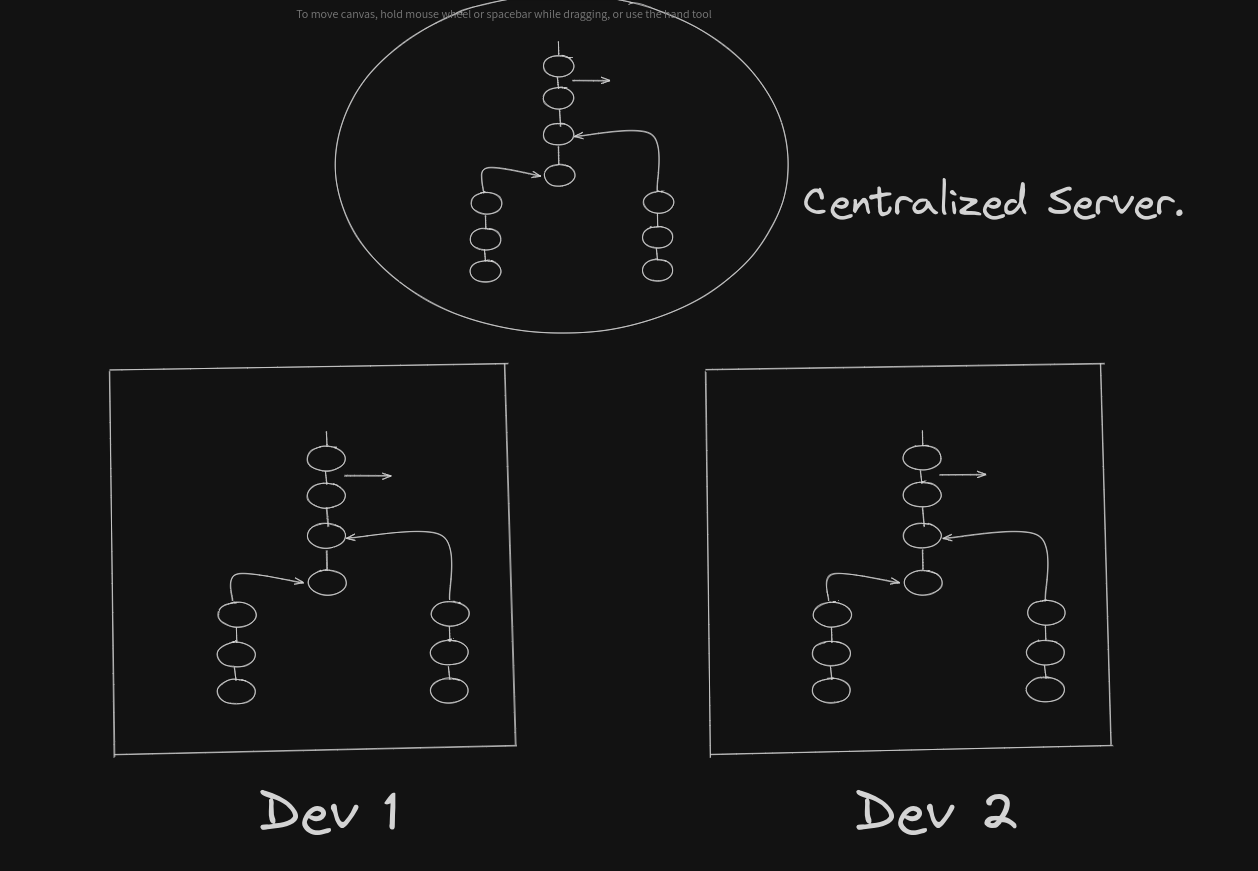
To facilitate this, the project is hosted on a centralized server (e.g., a GitHub repository) that acts as a shared space for the codebase. The server ensures that everyone on the team is working with the most up-to-date code.
How Git Handles Code Pushes
To push code from your local machine to the centralized server, you need to add a remote repository and then push your changes. The command to add a remote is:
git remote add "origin" [email protected]:User/UserRepo.git
Here’s what happens when you execute this command:
- Git sets up a link between your local repository and the remote repository, creating a read-only version of the repository's history on your local machine. This means you can view the history of the remote repository but cannot directly make changes to it.
- The branches in the remote repository are now accessible with a prefix indicating the remote name. For example, if your remote is named
origin, the branches will appear asorigin/main,origin/dev, etc. - These read-only branches are protected, meaning you cannot commit changes directly to them.
So, how do you work on this code?
- Git allows you to create a writable copy of a branch from the remote repository on your local machine. This writable branch is where you can make changes and commit new code.
- Once your work is done, you can push these changes back to the remote repository so that they are available to others.
Left: Developer's local environment; Right: Changes being pushed to the remote repository.
Clone Command
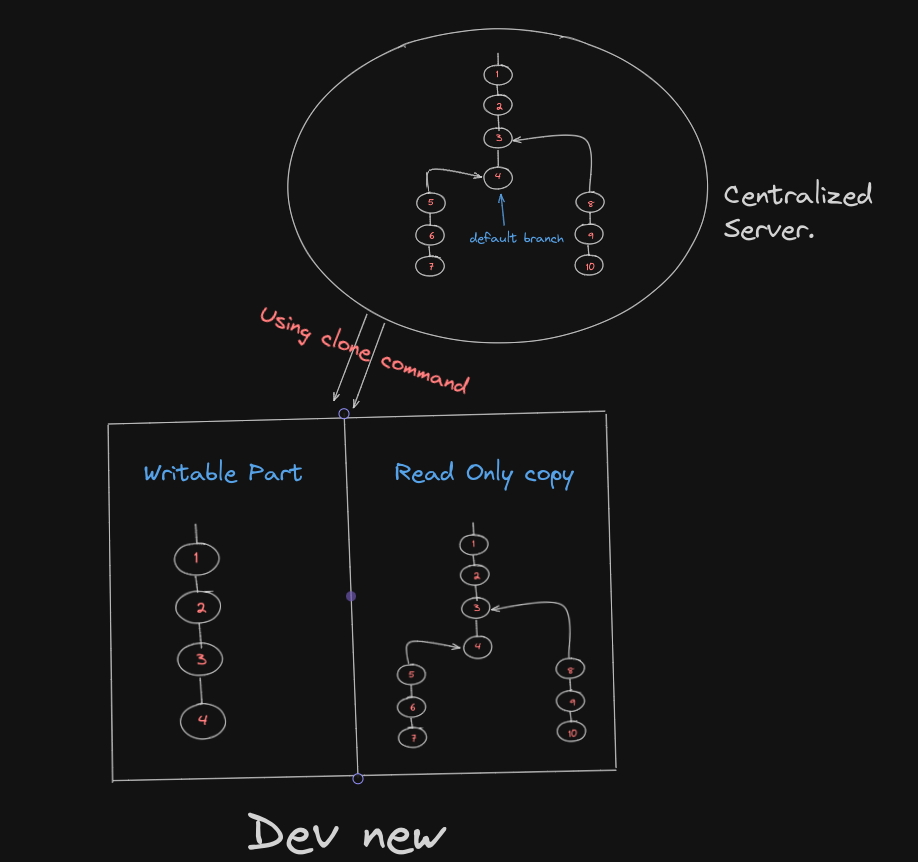
When a developer joins a project for the first time, they need to download the entire project from the centralized server. This is achieved using the clone command.
Workflow of the Clone Command
The clone command essentially does two things:
- Creates a Read-Only Copy of the Version History: The entire history of the project is downloaded, allowing the developer to access all past changes.
- Creates a Writable Copy of the Default Branch: Typically, this is the
mainbranch. This writable copy is where the developer will make their contributions.
The clone command ensures that the developer has everything they need to start working on the project immediately.
Important Concepts:
- Read-Only Branches:
If a developer tries to check out a specific commit from a read-only branch using git checkout origin/c8, they won’t be able to make changes to that commit. However, this action will update the writable part by incorporating the changes from c8 into the current branch.
Fetch and Pull Commands
Scenario: Synchronizing Changes
Consider a scenario where both Developer 1 and Developer 2 have cloned the same repository and are working on their respective features. Developer 1 completes some changes and pushes them to the remote repository.
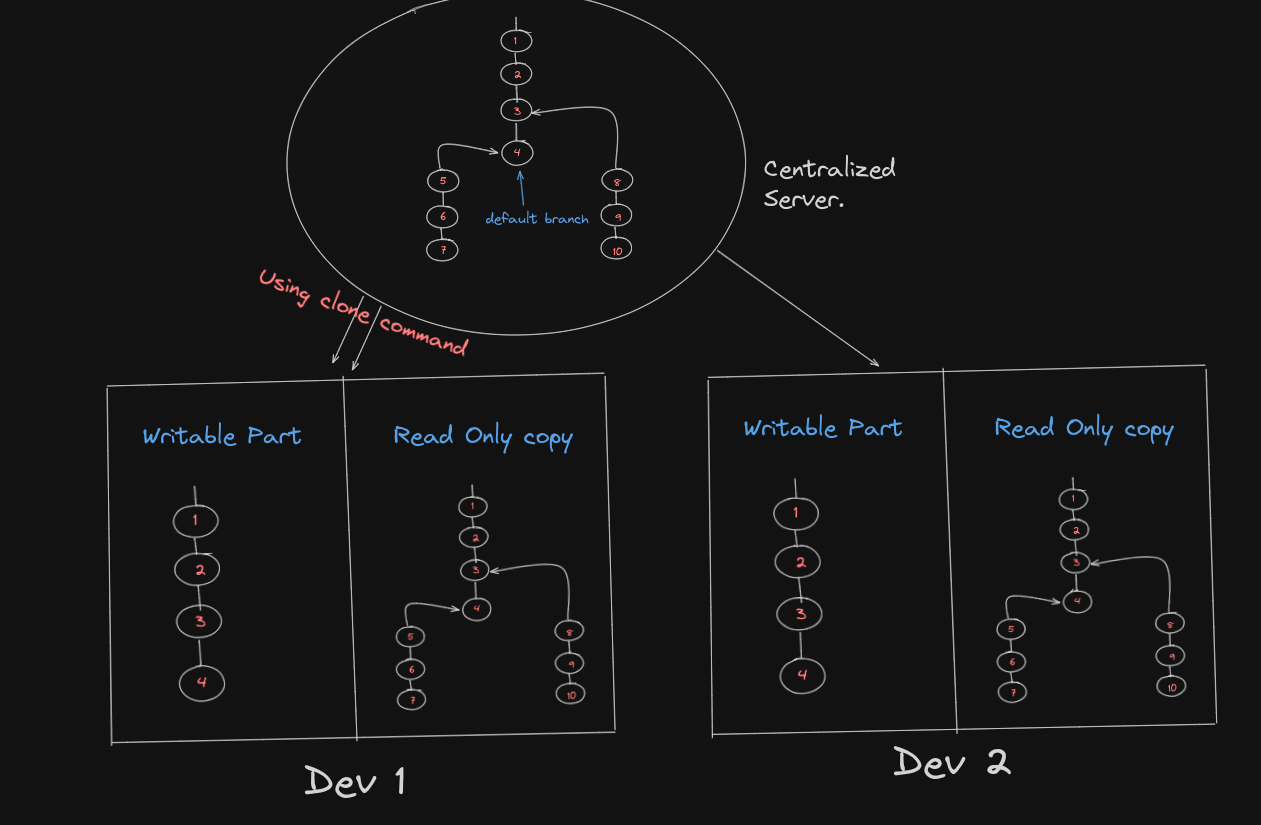
Now, Developer 2 needs to ensure that their local repository is up to date with the latest changes made by Developer 1.
Question for Learners:
Will Developer 2’s local repository automatically reflect the changes pushed by Developer 1?
Answer:
No, it won’t. Developer 2’s repository will only reflect the latest changes after they run specific commands to synchronize their local copy with the remote repository.
Git Commands to Synchronize Changes
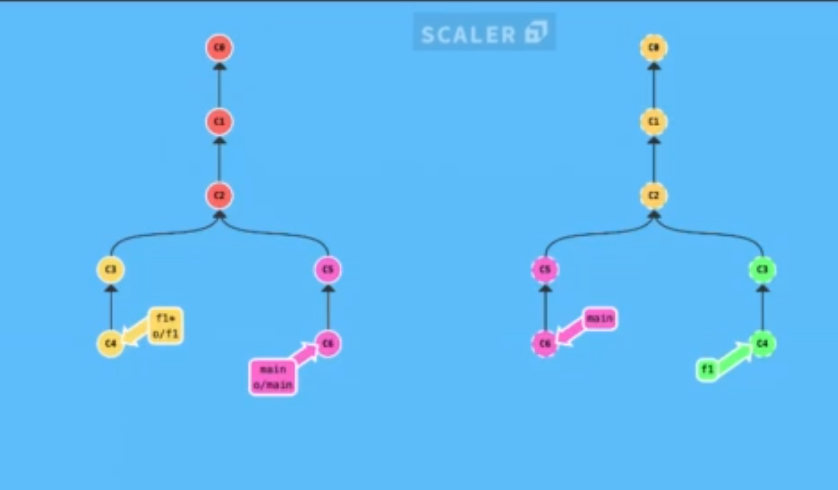
- Fetch Command:
The fetch command is used to update the read-only copy of the remote branches on your local machine. This means it pulls the latest changes from the remote repository but doesn’t update your working branch (the writable part).
-
Example: Running
git fetch originwill update the local references fororigin/main,origin/dev, etc., but will not merge these changes into your current branch. -
Pull Command:
The pull command is more comprehensive. It not only updates the read-only branches but also merges the changes from the remote repository into your current branch. This ensures that your local branch is fully synchronized with the remote repository.
- Example: Running
git pull origin mainwill fetch the latest changes fromorigin/mainand automatically merge them into your current branch.
Reference: Github link
GitHub
Forking a Repository
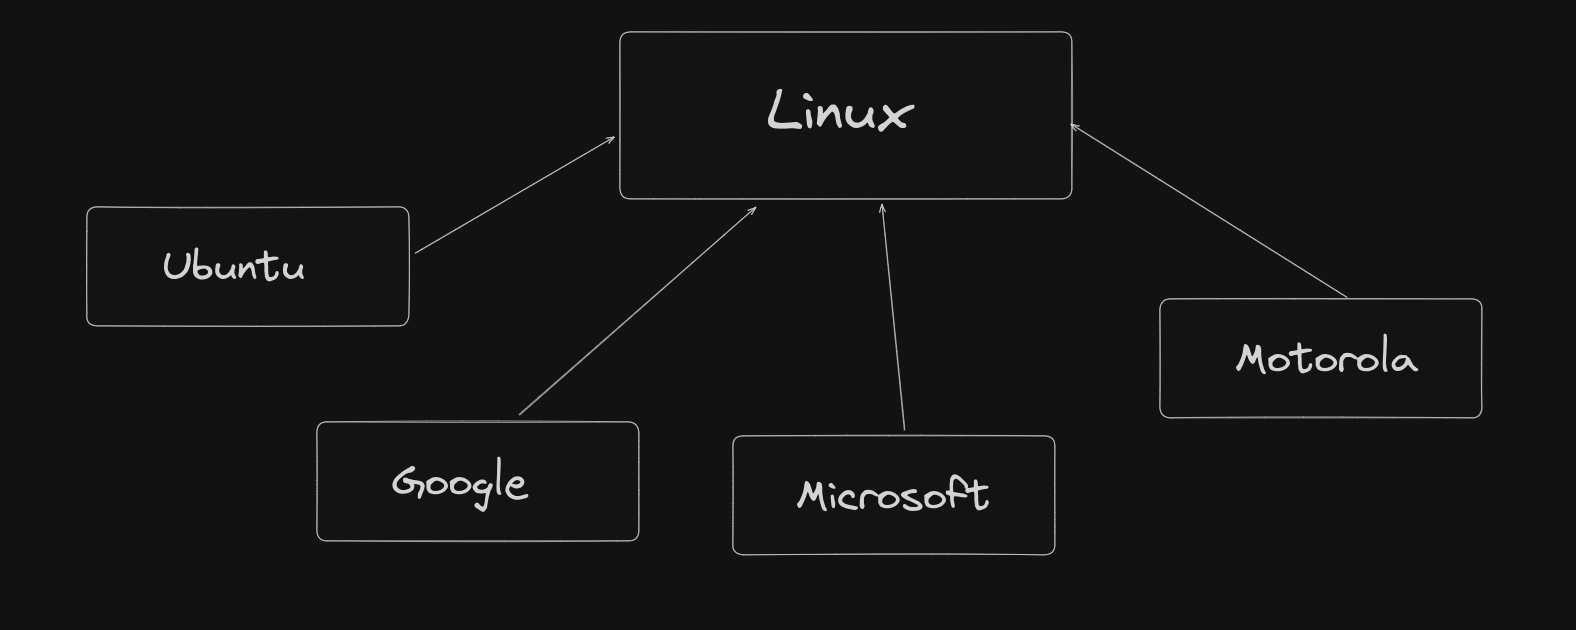
Forking is a critical concept in open-source development, where you might want to contribute to a popular project like Linux. Organizations like Google or Microsoft might create their own copies (forks) of Linux to tailor it to their needs.
Understanding Forking
Here’s how forking works:
- Remote of the Original Project:
On your local machine, you might add a remote that points to the original Linux repository. This ensures that you can stay updated with any new changes made to the project.
- Your Working Copy:
Your local repository will have its own branches, like main, where you can make your changes.
- Limitations on Direct Changes:
Since the original Linux repository is owned by someone else, you cannot directly push changes to their main branch.
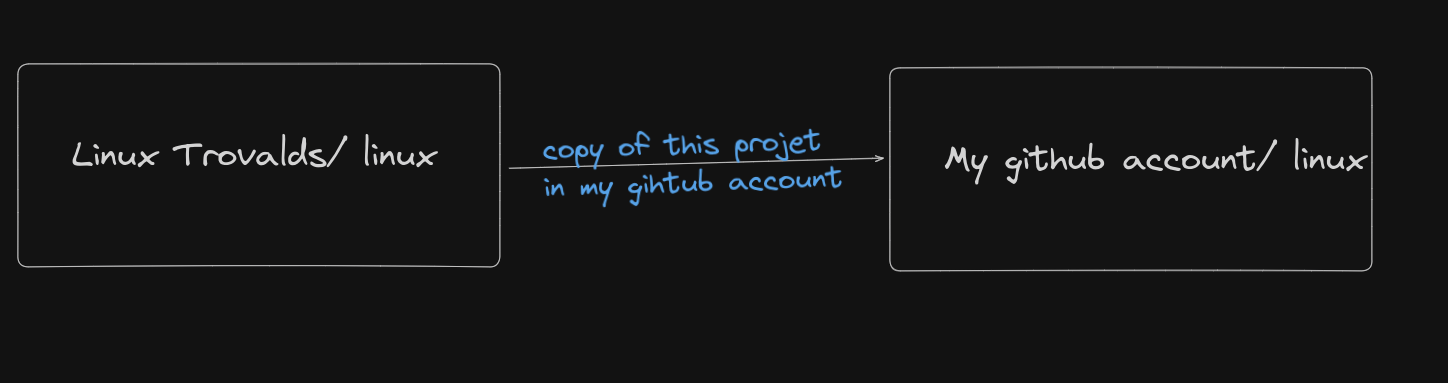
- Creating a Fork:
To contribute, you create a fork of the Linux repository in your GitHub account. This fork is a personal copy of the entire repository, where you have full control.
Making Your First Pull Request (PR)
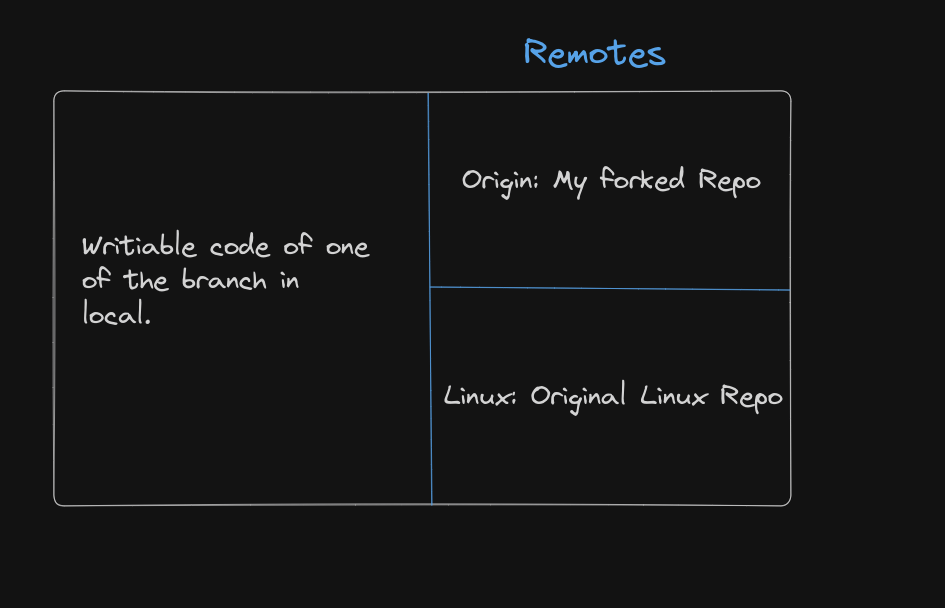
Once you have forked a repository, you will clone your fork to your local machine to start working. However, to keep your fork updated with the latest changes from the original repository, you need to add an additional remote pointing to the original repository.
Workflow: Making a Pull Request
- Clone Your Fork:
After forking the repository, clone it to your local machine. This gives you a working copy of the project where you can make changes.
- Add an Upstream Remote:
Add a remote that points to the original repository, often named upstream. This remote allows you to fetch the latest changes from the original project.
git remote add upstream https://github.com/original_user/original_repo.git
- Make Your Changes:
Work on the project, make improvements, fix bugs, or add features.
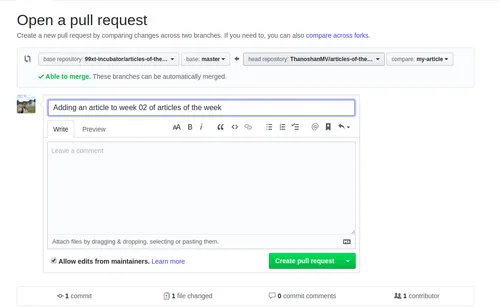
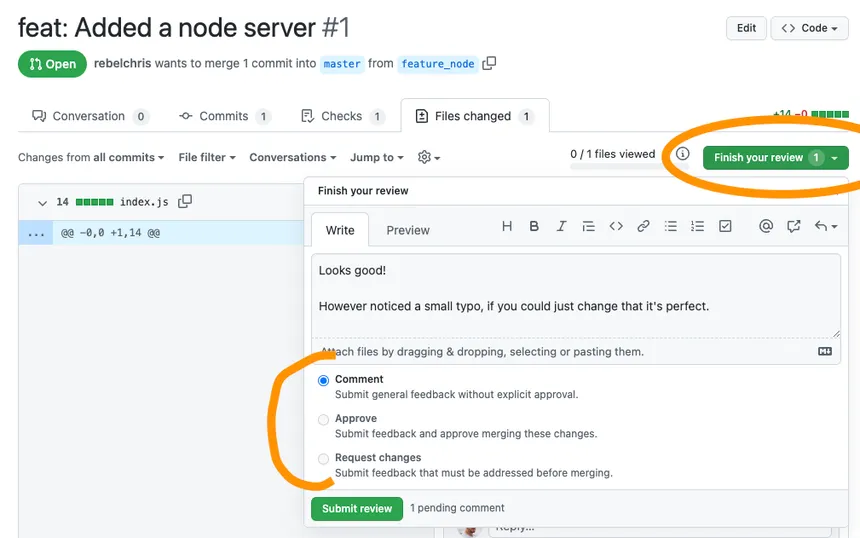
- Create a Pull Request (PR):
Once your changes are ready, push them to your fork and then go to GitHub to create a Pull Request. In this PR, you are asking the maintainers of the original repository to review and potentially merge your changes.
- Source Branch: The branch in your fork where you made the changes.
- Target Branch: The branch in the original repository where you want your changes to be merged, often the
mainbranch.